I was able to get on the water Sunday. Jim just bought a used 18'
US Yachts keelboat that he wants to use for the club. I helped where I
could to get it ready for the sail. So much work had to be done to get
ready. It was a good 45 minutes before we could launch, and this is with
a very experienced skipper (Jim). Upgrades to some of the hardware
would help, as would a working centerboard (it seemed to be jammed in
the up position) and better cockpit drains. But as a club boat, it'll
work great, though I know Jim is eager to finish his other project and
get on the water with his own vessel soon.
 |
| Shakedown
sail of Jim's new used boat Sunday afternoon. It is an 18' US Yachts racer. Once again, I
am impressed by how well PocketShip measures up to other boats in its
class. |
Since Sunday, it's been a bit of a whirlwind. I had to leave for Chicago for a couple days, which of course bit into boatbuilding time. I can't complain much. Chicago is one of my favorite U.S. cities. It's like Minneapolis, but much more interesting, with good public transportation, and vastly more cosmopolitan
Sailing, too, is a part of the culture. There are yacht clubs at the marinas downtown, not far from where I was staying. The view from my hotel over Lake Michigan was therefore summarily stunning. I could spy sails cruising back and forth along the coast. I later found that J/22's and J/24's can be rented for $55 an hour, which is a pretty good deal given what you get. Thirty-plus footers can be chartered for double the price (which seats 10 of your best friends). And 5-hour sunset cruises across the lake would be $135 (but that's only one way). No word on how much the taxi costs to get back.
 |
| A lonely sail up and down the coast. |
 |
| Two Chicago Police boats approach a fishing dinghy. Don't know what the guy did, but I hope he had a head on board. |
While in Chicago, I had plenty of time to consider next steps. When I left, I'd just re-glued the point of the keelson back down and stitched the aft 2/3 of the bilge and side panels on. Wait, what was that? Re-glued the point of the keelson? Oh yes. Literally 10 minutes after an email from Chris warned me that the keelson point can be tripped over and thus broken, I was sanding down some of the keelson squeeze out when I caught the point under the vacuum tube. I didn't even realize it was broken until I was done with the sanding. There it was, pointing 90 degrees straight up. My heart sank; curses flew.
 |
| Keelson point snapped. Vacuum hose behind was the culprit. |
Luckily, it was a clean break. I mixed up some thickened epoxy, aligned the break points, and fastened it with a drywall screw. I then let it cure over the next day, pulled the screw out, and incredibly, it was fixed. I carefully tried to assess the strength, finally slipping underneath and lifting the entire front half of the boat, crate and all, right where it was broken just a day before. Amazing! Chris wrote me after the fix and suggested much of the same except with an additional layer of 'glass. That would've been a good idea, but it turns out it wasn't needed.
 |
| Keelson point after glue up and sanding. Stronger than it was before. I <3 epoxy. |
I am convinced boatbuilding is a series of high-highs, low-lows, and many peaks and valleys in between victory and defeat. What seems like a catastrophe may not really be, especially if there's enough sandpaper and epoxy at hand. What seems like a major accomplishment is actually just the end of one chapter and the beginning of another. Life and stitching go on.
Stitching is something every boatbuilder at one point or another will experience. It's tough business. However, thanks to the hand ratcheting I did while building the crate, my hands and wrists are in good shape. I found it much easier to take two pliers and work them like a surgeon. One plier holds one wire, and the other crosses, then twists around. Gripping near the base and a good few turns brings the stitch up close and provides the strength to carry on. I also found that keeping the wires flat on the opposite end of the twist helps.
 |
| First stitches go in. The container holds the 18g wire. Flattening these rounded wires helps tie these better. |
 |
| First side panel stitches go on. The keelson is actually broken here but I went ahead and stitched the aft 2/3 anyway. |
 |
| Took a break for lunch after doing the port side panel. I moved the bike to the backyard right after this photo. |
 |
| Clamps hold the side panels in place. |
 |
| Close up of side-bilge panel stitches. |
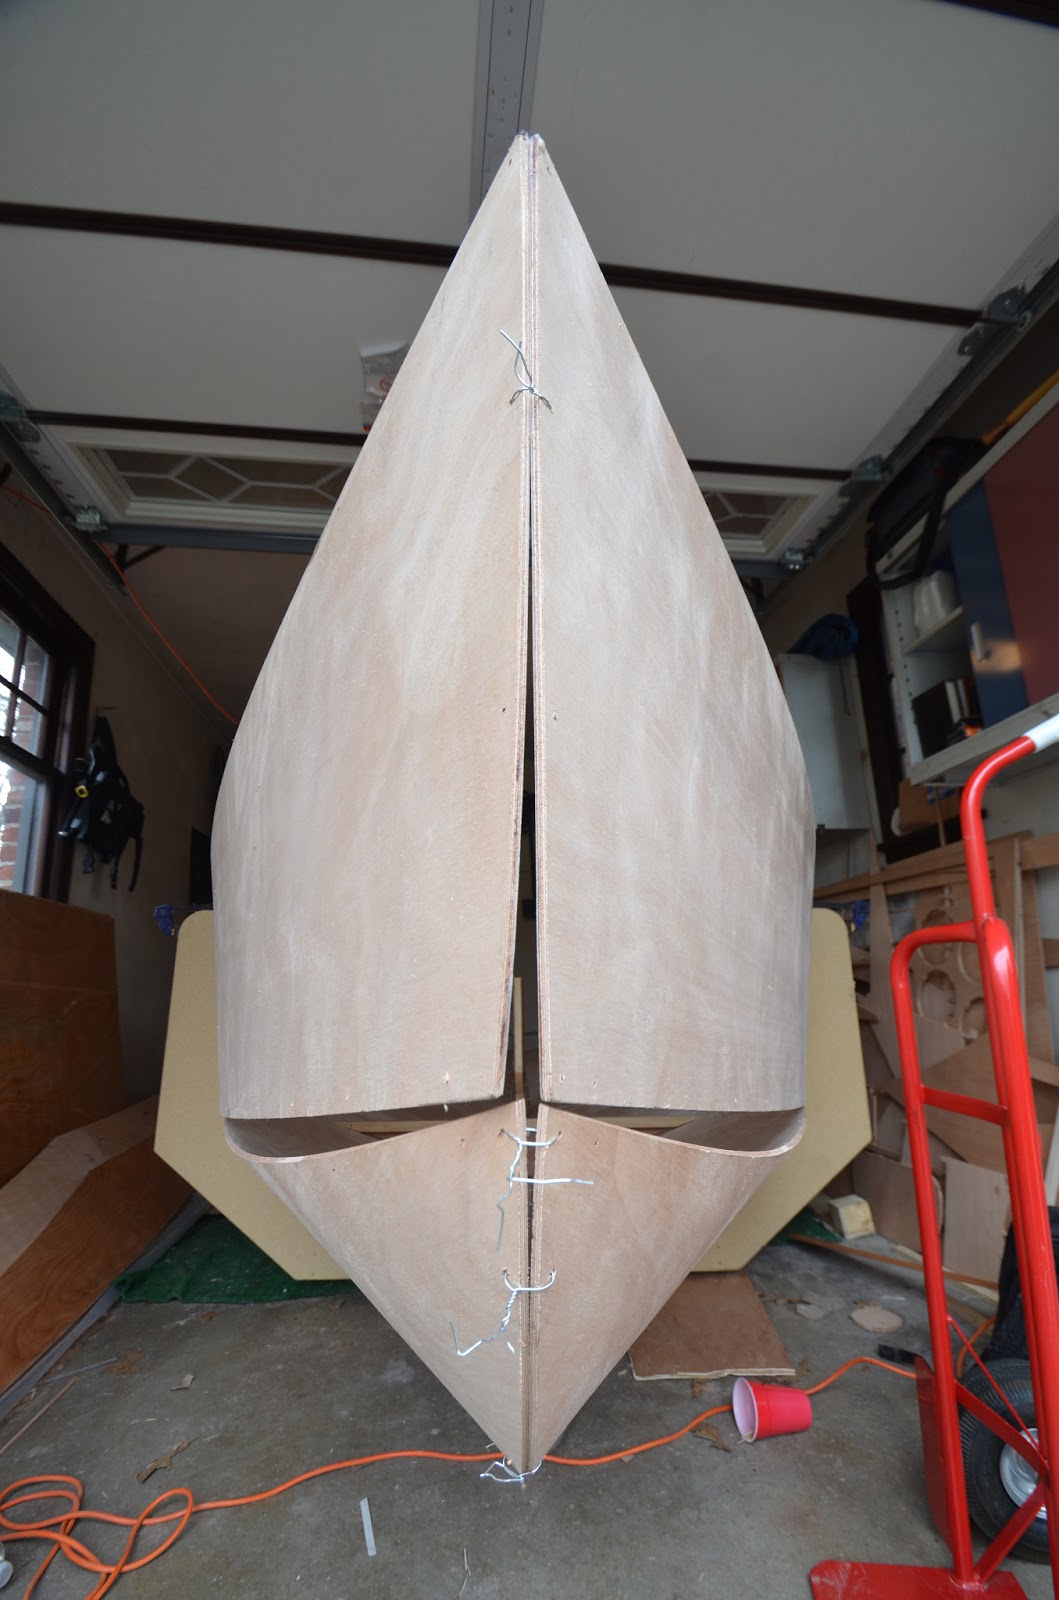
After the keelson was fixed, I was able to finish out the bow. This was a major tussle and required the strongest hands I know: My wife. Seriously. Her fingers are incredibly strong for her size; she's the one in the family that opens up the peanut butter jars. This was no problem for her. As she squeezed the bow together, I stitched, furiously trying to keep them close. All but the very top 1/2" inch touches "inside corner to inside" corner. With a smalll shim, I'm able to get the top 1/2" to about 1/8" together. Good enough, I say.
 |
| Before
installing the shim you can see where work is needed. The single stitch
is actually my "key" that closes up the bow so I can shut the
garage door. |
 |
| View
of work to be done. Also notice the unfinished centerboard and the
'glassed top panels. I'll need to move these out as they're just in the
way right now. |
 |
| Both side panels stitched. Floor 4 is also stitched. |
Pressing on, I decided to install the floors. It takes contortionist skills to get to some of these areas. This
is why I decided to wait before stitching the side panel together at
the bow, so that I can have an easier time accessing the holes for the
forward floors and bulkheads. The benefit to stitching the hull together
first is that the proper
shape can take place. I found, though, that the floors wanted to push
the hull panels out, meaning it was faster to place the floors and then
the hull around it. In hindsight, I don't know how I would've been able
to stitch these with the bow together. Otherwise, I would've been
hanging in the boat, risking life, limb, and plywood in the process.
 |
| Floors and bulkheads go in. Floor 8 and the transom have yet to be installed. |
 |
| These cleats in bulkheads 1 and 2 need to be beveled for the hull shape. I haven't pulled the side panels down at this part of the hull yet which is why the panel isn't flush with bulkhead 1. |
I finally finished bulkhead 8 last night. Just waiting for the final layer of epoxy to settle, then a quick sanding before the install. I'm not sure I'll be able to do the transom tonight (it, too, requires some beveling) and I want to be sure I get a good fit in this critical component. My goal was to have the hull assembly stitched before Okoumefest so
that, upon return, I could begin the fillets and 'glassing. That may have to wait a little bit but at least I'll have enough of a story to tell to fellow builders in Maryland.


No comments:
Post a Comment